What you need before you start
- Your Android mobile device, updated to the latest version of the mobile operating system. (Example Android devices include Samsung Galaxy, HTC, Iconia, Nexus).
- The device must be connected to the Internet.
- You need a Bell Aliant email address and password. If you do not have a Bell Aliant email address, you can add one by following our Add an email address support article
Note: If you do not know your email address or password, you can change or reset the password using My Account -
In order to setup your email program on your computer or mobile device, you will need the following email settings:
Incoming mail settings
IMAP: imap.bellaliant.net Port: 143 Authentication: Username (full email address) and password Outgoing mail settings
SMTP: smtp.bellaliant.net
Note: If you are attempting to access your email while over Bell Mobility's Network, you need to use Bell's outgoing mailserver (mail.1xbell.ca)
Port: You can keep your program set to the default ports. Authentication None - Leave blank
Watch our video
Follow these easy steps
Tap Settings and choose Add Account under Accounts & Sync
- From the Android Home screen tap Settings.
- Tap Accounts & sync.
- Tap ADD ACCOUNT.
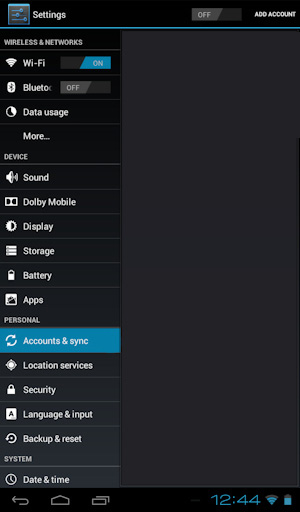
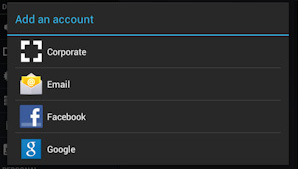
- Tap Email.
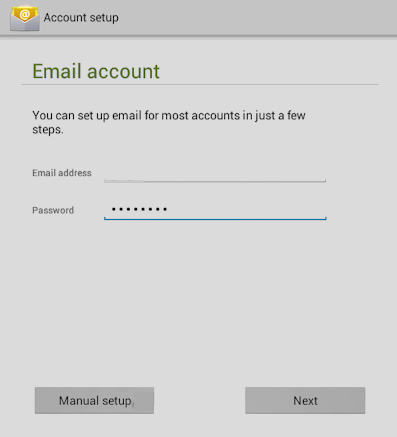
Enter your email address and password
- Enter your email address and password.
- Tap Manual setup.
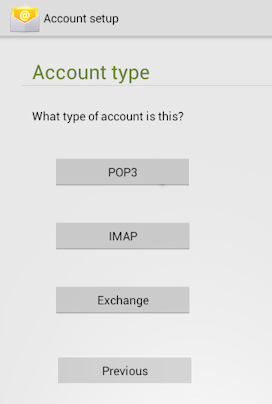
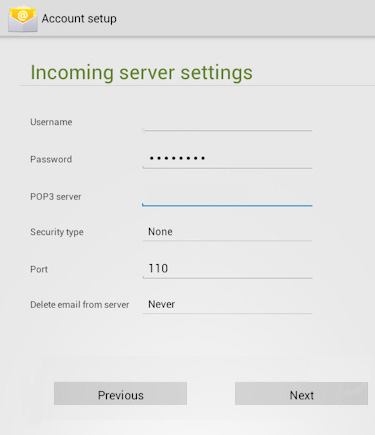
Enter your incoming mail server information
- Under What type of account is this? Tap IMAP.
- Under the Incoming server settings heading, confirm your username and password.
- Enter the IMAP server name : imap.bellaliant.net
- Change the port to 143.
- Choose your preference to delete mail from server.
- Tap Next.
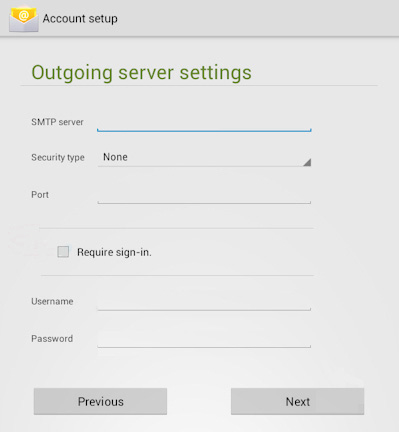
Enter your outgoing mail server information
- Under the Outgoing server settings heading, enter the STMP server.
- Do not change the default settings for Security Type and Port.
- Uncheck the Require sign-in button (it is checked by default).
Note: Leave this button checked if you wish to verify your username and password each time you check your email. - Tap Next.
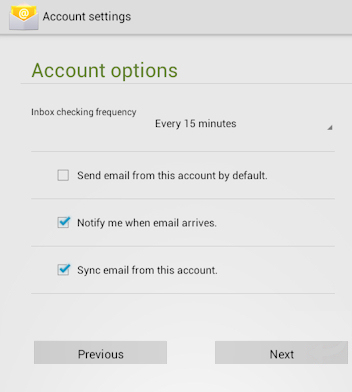
Choose your Account Options
Under Account Options set your personal preferences:
- Choose the frequency to automatically check your email.
- Choose to send email from this account by default.
- Choose to be notified when email arrives.
- Chose to sync email from this account.
- Tap Next.
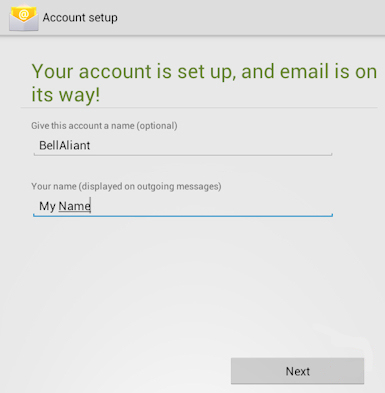
Name your new email account
- You are notified that the email account is set up. Enter a name for the new email account.
- Enter your name as you wish it to appear on outgoing email messages.
- Tap Next.
You have successfully set-up email on your Android mobile devices!
Additional information
If you have difficulties setting up your Android device or need more help on using it, please contact your cellular provider directly. If you are using Bell Mobility, visit Bell Support